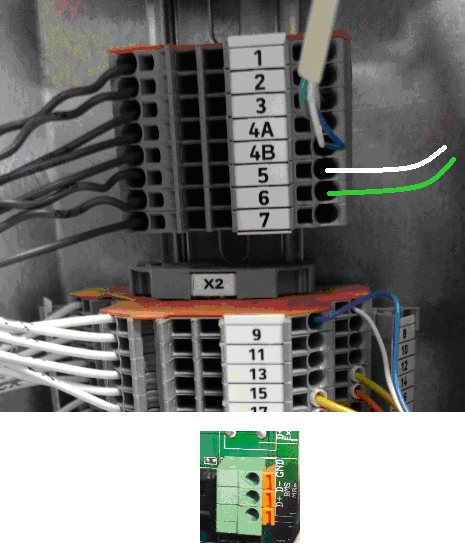
Interface install instructions for Thermia Calibra, Atlas and Diplomat Inverter with Genesis touch screen controller.
For certain models (older) there is a requirement that the indoor sensor kit is installed so that the needed connector terminals are available.
Installation
- Make sure the interface card is plugged into the H66 main unit as instructed in the H66 manual.
- Power down the heat pump and open the front cover
- Connect the H66 interface cables as follows:
- Older pumps: Locate the 8 way terminal where the Indoor sensor cable is connected. See picture 1
- Newer pumps: Locate the green built in 3-way terminal with text BMS / MBe. See picture 2
- Connect cables: White: 5 (or D+), Green: 6 (or D-)
- Power
- For newer pumps: connect the purple cable to the +24V terminal on Mbe socket and blue to GND. Powe up pump.
- Gor older pumps: Power up the heat pump and connect the 5v power adaptor to the H66.
- In the display settings, activate BMS.
- Modbus mode: RTU
- Address: 1
- Baudrate: 19200
- Parity : Even
- Stop bits: 1
- Finalize the H66 installation according to its manual and verify that your heat pump does not alarm and works as normal.

